Add a video editor to your React Native app (Expo included)
Your users want to make video in your app, and "trim and post" isn't enough for them. This guide shows how to add a complete React Native video editor to your app, Expo included, with Nitrakit: install, show the editor, connect your own media picker and export an MP4. The code comes straight from the React Native guide in our docs.
Why the editor belongs inside your app
When editing happens somewhere else, users leave. They export, switch apps, edit, and maybe come back to post. Each step is a chance to lose the post, and the moment of making something happens in someone else's product instead of yours.
The other option, building the editor yourself, means a timeline, text, captions, effects, audio and export, on iOS and Android, kept working release after release. For most app teams that is a second product, and it pulls engineers off the one you're actually building.
Nitrakit is the third option: a complete editor you add as a component, styled as your app.
What your users get
The editor your users already know how to use:
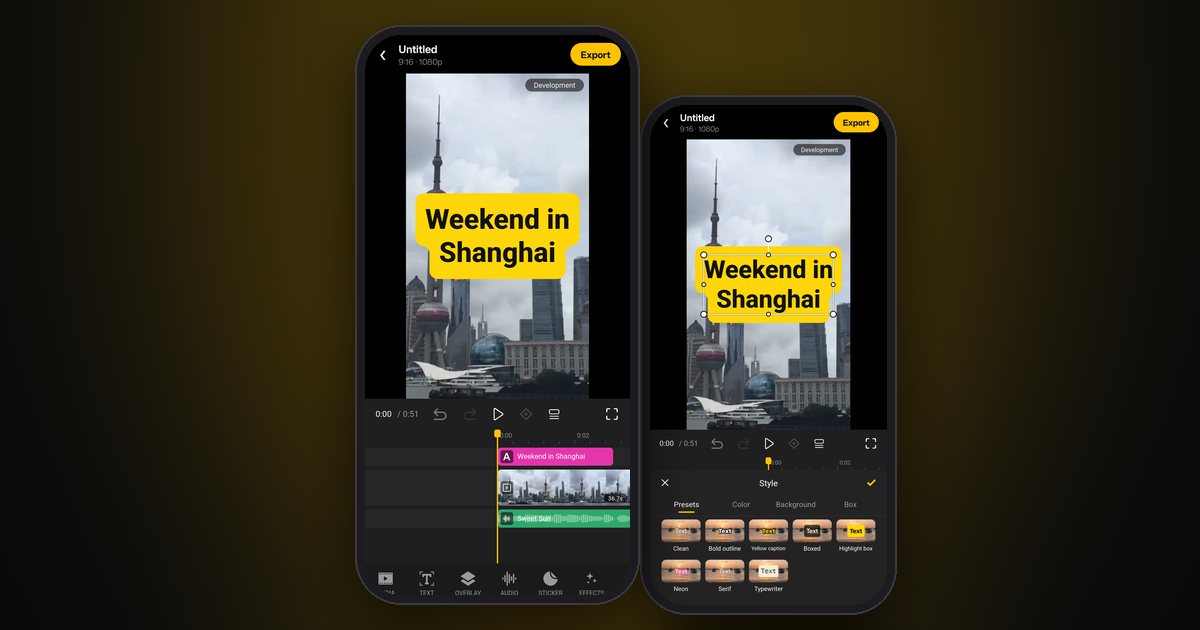
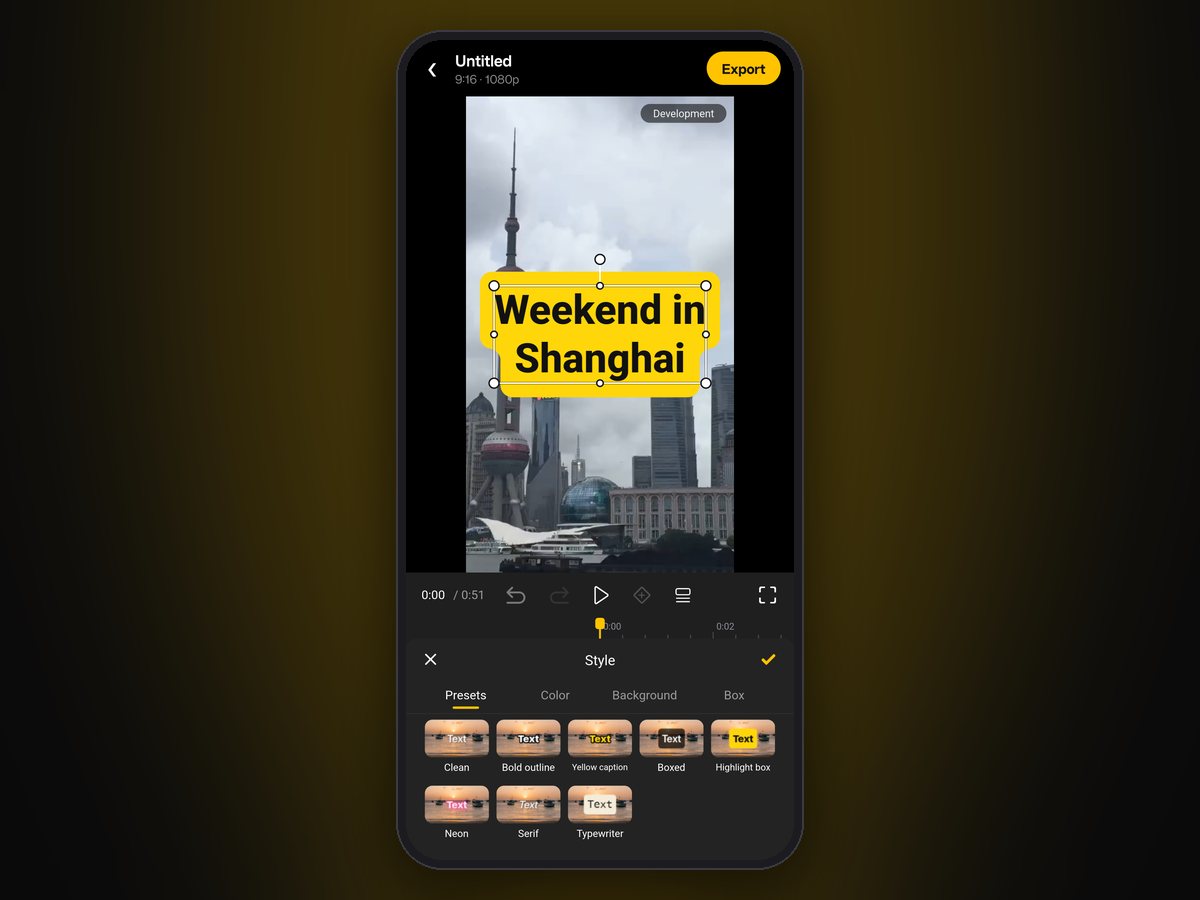
- A preview that plays in real time. Users tap a layer to select it, then drag, pinch or use its handles to move, resize and rotate it.
- A timeline with tools. Trim, split, speed, volume, effects, transitions, text with animations, audio, and undo.
- Word-timed captions from your app's own speech-to-text, so you choose the provider.
- Export to MP4 on the device, while the user keeps editing.
Editing and export run on the user's device, so there's no video server for you to run. Projects save as JSON that you own, so users can come back to a draft later or on another device.
What stays yours: where media comes from, what your pickers look like, the wording, and the look of the whole editor. More on that below.
Requirements
From the React Native guide:
- React Native with the New Architecture (the default since 0.76) and
react-native-nitro-modules. - iOS 16 or later; Android 8.0 or later (
minSdkVersion26). - Expo: a development build. Expo Go can't load the SDK's native code.
If you're on Expo, that last point is the only difference: you run your own development build instead of Expo Go, as you would for any library with native code.
Install the React Native video editor
During early access, the SDK comes from Nitrakit's package registry. Your invite includes an
access token; keep it out of your repository and read it from the NITRAKIT_TOKEN
environment variable. The full steps are on the
install page.
Point the @nitrakit scope at the registry in your project's .npmrc. It's safe to commit,
because the token comes from the environment:
@nitrakit:registry=https://packages.nitrakit.dev/api/packages/nitrakit/npm/
//packages.nitrakit.dev/api/packages/nitrakit/npm/:_authToken=${NITRAKIT_TOKEN}
npm install @nitrakit/react-native react-native-nitro-modules- iOS: the native SDK ships inside the package. Run
pod install. If users pick from their photo library, addNSPhotoLibraryUsageDescriptionto yourInfo.plist. - Android: Gradle downloads the native SDK from the registry too. Give it the token in your
user-level Gradle settings, or set
NITRAKIT_TOKENin the environment (for example on CI):
nitrakitToken=<your token>Raise minSdkVersion to 26 if it's lower.
Add it to an Expo app
On Expo, add the config plugin to app.json instead of editing native files. It sets the
Android version for you:
{ "expo": { "plugins": ["@nitrakit/react-native"] } }Then run npx expo prebuild and build your development build as usual. Your team keeps the
Expo workflow it already has.
Create a project
An editor holds one project and its undo history. Create it with your output size and frame rate, then add the user's first video:
import { createEditor, importFile } from '@nitrakit/react-native'

const editor = createEditor(1080, 1920, 30)

const media = editor.addMedia(assetId, importFile(pickedUri, 'clip.mp4'), 'clip.mp4')
const track = editor.addTrack('visual', true)
editor.insertMedia(track, media.source, 0, 0, media.durationUs)
assetId is your app's id for the file, for example its key in your storage. Projects refer
to media only by these ids, which is what lets a project sync through your backend and reopen
on another device. See Projects and media
for signed URLs and the media resolver.
Show the editor
Two components make up the editor. NitrakitPreview plays the project; NitrakitEditor has
the timeline, tools and panels. Give both the same editor and they stay in sync:
import { NitrakitEditor, NitrakitPreview } from '@nitrakit/react-native'

export function EditorScreen({ editor }: { editor: Editor }) {
  return (
    <View style={{ flex: 1, backgroundColor: '#000' }}>
      <NitrakitPreview editor={editor} style={{ flex: 1 }} />
      <NitrakitEditor editor={editor} style={{ height: 400 }} onRequest={onRequest} />
    </View>
  )
}
Create the editor once per project (in a useMemo or your state store), not on every render.
Because they're two components, the layout is yours. Show both, only the timeline, or only the preview with controls you build; the layouts page covers each.
Connect your own media picker with onRequest
The editor never opens the photo library or a file browser itself. When the user taps
Add media, picks a font or a colour, the editor asks your app through onRequest. So the
picker is your screen, in your design, and media can come from the camera roll, your own
content library or your backend.
Return the answer, or a promise of it. Return null if the user backed out, or nothing to let
the SDK show its built-in picker:
async function onRequest(request: EditorRequest) {
  switch (request.kind) {
    case 'addMedia':
    case 'addOverlay':
    case 'addAudio':
    case 'addSticker': {
      const picked = await pickFromLibrary() // your picker
      if (!picked) return null
      const path = importFile(picked.uri, picked.fileName)
      const media = editor.addMedia(startUpload(path), path, picked.fileName) // your storage's id
      return { source: media.source }
    }
  }
  // anything else: the built-in picker
}
The built-in pickers cover fonts, colours, text, text styles and filters, so you can start with media only and replace the rest when your designers get to it. Every request and its answer is on the Pickers page.
Export an MP4
Export renders the project to an MP4 in the background, while the user keeps editing:
import { filesDir } from '@nitrakit/react-native'

const path = `${filesDir()}/export-${Date.now()}.mp4`
try {
  await editor.exportVideo(path, editor.exportSettings(1080), (f) => setProgress(f))
  // the file at `path` is ready to save, share or upload
} catch (e) {
  // failed, or cancelled with editor.cancelExport()
}
What happens to the file next is up to your app: save it to the photo library, share it, or upload it to your backend. Settings, progress and cancelling are on the Export page.
Make it look like your app
Product and design teams push back on a screen that looks borrowed. The editor takes your theme as a prop:
<NitrakitEditor
  editor={editor}
  theme={{
    background: '#101418',
    bar: '#0b0e11',
    accent: '#2ee6a6',
    font: 'Brand Sans',
    clips: { video: '#3355ff', audio: '#18a058' },
  }}
/>
Beyond colours and fonts, you can remove tools you don't offer, add your own, swap the icons, and rename every label in your users' languages. It's all set at runtime, so it can follow your app's dark mode, feature flags and language. See Customisation.
Curious what it adds to your app's download? The App size page lists it per platform, including React Native.
Try it free, license it for release
You can build and test everything without a license key. Before you release your app, you get a license key and install it once when the app starts, outside any component:
import { setLicense } from '@nitrakit/react-native'

const status = setLicense('nk2.…')
if (status.problems.length) console.warn('Nitrakit:', status.problems)
The key names the apps it covers, so it can live in your code. Details are on the License key page.
Get early access
Nitrakit is in early access. Request a registry token, follow the React Native guide, and you'll have the editor running in your own development build. Want to see it first? The web demo shows the editor in your browser.
Questions while you integrate? Ask us on Discord.